

As we dive into the world of assembling a hi-hat clutch, it’s important to understand the key components involved and their roles in creating the perfect rhythm. From the hi-hat stand to the clutch, each element plays a crucial part in bringing your beats to life.
Firstly, let’s discuss the hi-hat stand. This piece of hardware holds everything together and provides stability for your cymbals. It consists of various parts such as the base stand, hi-hat rod, and an upper height adjustment tube that allows you to find just the right positioning for your setup.
Next, we have the hi-hat clutch. This component is responsible for connecting your top cymbal with its bottom counterpart. Acting like a hinge, it enables smooth opening and closing movements when operating your hi-hats.
In our journey through assembling a hi-hat clutch, we will also touch upon topics such as adjusting heights, using memory locks for consistency between setups, and ensuring proper grip with non-loosen nuts.
So if you’re ready to embark on this percussive adventure, let’s explore each step in detail and get started with assembling your hi-hats!
Stock Check
When I’m putting together a hi-hat clutch, the first thing I always do is take a good look at my stash of parts. It’s important to make sure I’ve got everything I need before diving into the assembly process. Here’s what I usually check for:
- Base stand: This is the sturdy foundation that holds my hi-hat setup together. I’ve got to double-check that it’s in good shape and able to support all the weight.
- Hi-hat rod: This little guy connects the base stand to the top half of my hi-hat. Without it, my setup would be incomplete.
- Top half: This includes all sorts of important components like the upper height adjustment tube and tone block. Before getting started, I’ve got to make sure every single piece is there and working like a charm.
- Hi-hat clutch: The clutch is key because it attaches to the hi-hat rod and lets me control how my hi-hats move around. It’s an essential part of the whole setup.
- Hi-hats: Ah yes, these are the cymbals that’ll be attached to my trusty clutch. Gotta have them!
By doing a proper stock check, I can rest easy knowing that I’ve got all the necessary parts before jumping into assembly mode.
Base Stand
When assembling a hi-hat clutch, don’t overlook the importance of the base stand. It plays a vital role in providing stability and support for your entire setup. So, how do you choose the right base stand? Well, there are a few factors to consider.
Firstly, it’s crucial to find a base stand that can withstand the weight of your hi-hat cymbals without wobbling or tipping over. Look for one that offers adjustable height and has a sturdy construction. This way, you can customize it to fit your playing style and ensure it stays put.
To prevent any unwanted movement while you play, place the base stand on a stable surface like a carpet or rug. This adds an extra layer of security and minimizes any sliding that could throw off your rhythm. And here’s a pro tip: make sure all screws and bolts are properly tightened before starting your performance. This way, your base stand will remain securely in place throughout.
It’s important to handle any adjustments to the base stand delicately so as not to damage its delicate parts. Taking these extra measures will lay a solid foundation for your hi-hat clutch setup, allowing you to focus confidently on maximizing your playing experience.
So go ahead, pick the perfect base stand and rock those beats with peace of mind!
Hi-Hat Rod
- Attach the Hi-Hat Clutch: Begin by attaching the Hi-Hat clutch to the top of the rod. The clutch is a crucial component that allows you to control the opening and closing of the hi-hat cymbals.
- Set the Upper Height: Adjust the upper height of the rod according to your preference. This will determine how high or low your hi-hats will sit above the ground.
- Secure with Lock Nuts: Use lock nuts to secure the upper height adjustment in place. This ensures that your hi-hats remain at your desired height throughout your performance.
- Thread on a Cymbal Felt: Next, thread on a cymbal felt onto the rod. The cymbal felt acts as a cushion between the hi-hat cymbals and prevents any unwanted vibrations or damage.
- Place Bottom Cymbal: Carefully place the bottom hi-hat cymbal onto the rod, ensuring that it sits securely on top of the cymbal felt.
- Add Top Cymbal: Lastly, add the top hi-hat cymbal above the bottom one. Make sure they are aligned properly and create a tight seal when closed together.
By following these steps, you can assemble your Hi-Hat Rod correctly and ensure optimal performance from your hi-hats during your drumming sessions or performances.
Top Half
To complete the assembly of your hi-hat clutch, you’ll need to focus on the top half. This section includes crucial steps that will ensure proper functionality and stability while playing. First, secure the clutch to the top hi-hat rod by tightening the clutch screw. Be sure to check that it’s firmly in place before proceeding.
Next, attach the uppermost cymbal using the provided wingnut. Adjusting its tightness will affect how responsive your hi-hats are when played. Experiment with different tensions until you find a balance that suits your playing style.
Remember, keeping the pedal and spur clean is important for smooth operation. Use a gentle touch when cleaning and be cautious not to damage any part of the internal mechanism.
Now that you’ve assembled both halves of your hi-hat stand, it’s time for final positioning and adjustments. Stay tuned for the next section where we discuss achieving optimal positioning for enhanced playability!
Hi-Hat Clutch

The Hi-Hat Clutch is an essential component of your hi-hat stand that allows you to control the opening and closing of the cymbals. It consists of two main parts: the clutch itself and the rod that connects it to the top half of the stand.
- Attach the Clutch: Start by placing the clutch onto the hi-hat rod. Ensure that it is securely fastened, as you don’t want it coming loose while playing.
- Adjusting Tension: The clutch features a tension adjustment screw that determines how easily the cymbals open and close. Experiment with different settings to find your desired feel and response.
- Connecting Top Half: Once the clutch is in place, connect the rod to the top half of your hi-hat stand. This connection should be tight, preventing any wobbling or instability during play.
- Safety Measures: To prevent accidental disconnections, consider adding a memory lock at each joint between components. This will ensure that everything stays securely in place throughout your performance.
Remember, a well-functioning hi-hat clutch is crucial for achieving optimal control and sound from your hi-hats. Take your time when assembling this component, making sure all connections are secure and adjustments are dialed in to suit your playing style.
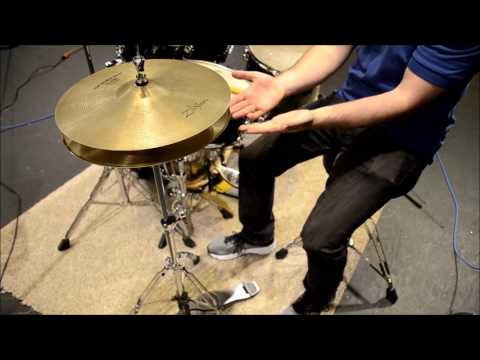
Hi-Hats
Alright, let’s dive into the world of Hi-Hats and get your drum set assembly all sorted. In this section, I’ll walk you through the nitty-gritty details of setting up and fine-tuning your Hi-Hat cymbals to ensure top-notch performance.
When it comes to picking out your Hi-Hat cymbals, there are a few things to consider. First off, think about the sound you fancy, your playing style, and how well they mesh with the rest of your drum kit. It’s crucial to find a model that tickles your fancy and blends harmoniously with the overall sound you’re aiming for.
Once you’ve made up your mind on which Hi-Hat cymbals tick all the boxes, it’s time to fix them onto your stand. Start by placing the bottom cymbal snugly on top of the stand’s lower tube or clutch plate, ensuring it sits securely.
Moving on, take hold of the top half of the Hi-Hat and gently align it with the bottom cymbal. Slide that rod right through both holes at the center of those cymbals and give it a firm but gentle tightening grip. Be mindful not to overdo it though, as excessive tightness can hamper the natural movement of the Hi-Hat when you play.
Once you’ve ensured that your Hi-Hats are properly secured in place, give them a quick test run by pressing down on that pedal. You should detect a slight separation between both cymbals when fully open and enjoy a satisfying “chick” sound when they’re closed together tightly.
Don’t forget to tinker with the tension of your Hi-Hat clutch until it hits that sweet spot according to your preference. Feel free to experiment with different settings until you land on what perfectly complements your unique playing style.
With this vital step under our belt (or shall we say drumhead?), your drum set is swiftly taking shape. In the next section, we’ll delve into the fascinating world of Final Positioning for all your assembled components — so keep reading on to complete the puzzle!
Final Positioning
Once you have assembled your hi-hat clutch, it’s time to focus on the final positioning of your hi-hats. This step is crucial in ensuring optimal playability and sound quality.
To start, place the bottom cymbal seat onto the stand. Make sure it is securely fastened using the memory lock to ensure stability during play. Next, attach the top half of your hi-hats onto the hi-hat rod. You can adjust the angle of the top cymbal by loosening or tightening the clutch.
When positioning your hi-hats, keep in mind that they should be within easy reach while still allowing room for other pieces of an drum set. Experiment with different placements until you find what feels most comfortable for you.
Remember to be gentle with adjustments, as excessive force can cause damage to your equipment. With careful attention to detail, you’ll be able to achieve the perfect positioning for your hi-hats and enhance your overall drumming experience.
Wrap Up
In conclusion, assembling a hi-hat clutch requires attention to detail and proper technique. By following the steps outlined in this guide, you can ensure that your hi-hat stand is set up correctly for optimal performance. Remember to check for any missing parts or malfunctioning components before assembling. When setting up the base stand, make sure it is stable on the floor and adjust the spur if needed for added stability. Attach the hi-hat rod securely and adjust it to your desired height. Install the top half of the clutch onto the rod and tighten it appropriately. Finally, attach your hi-hats to complete the assembly process. With these steps completed, you’ll be ready to add percussion to your setup and start playing!
FAQ
What is a hi-hat clutch?
A hi-hat clutch is a device used to hold the top hi-hat cymbal in place on the hi-hat rod.
Do I need a hi-hat clutch to assemble hi-hats?
Yes, a hi-hat clutch is necessary to assemble hi-hats as it secures the top hi-hat cymbal.
How do I attach the hi-hat clutch to the hi-hat rod?
To attach the hi-hat clutch to the hi-hat rod, simply slide it onto the rod and tighten the clutch to secure it in place.
Can I use a different brand hi-hat clutch with my hi-hat rod?
In most cases, hi-hat clutches are universal and can be used with different brand hi-hat rods. However, it’s always recommended to check compatibility before purchasing.
How tight should I secure the hi-hat clutch?
You should tighten the hi-hat clutch enough to securely hold the top hi-hat cymbal in place, but not overly tight as it may restrict the cymbal’s movement.
How do I position the hi-hat clutch on the hi-hat rod?
The hi-hat clutch should be positioned on the hi-hat rod so that it allows the top hi-hat cymbal to move freely when the hi-hat pedal is pressed or released.
Do I need any special tools to assemble the hi-hat clutch?
No, you do not need any special tools to assemble the hi-hat clutch. It can be easily attached and tightened by hand.